Wednesday, October 12, 2016

Pumpkin Fritters

 Appetizers are my friend.  I would much rather graze on appetizers than actually have a sit-down meal prepared for me.  I suppose that could be why I struggle with my weight.  Because I prefer to have bite size items, it becomes a little more difficult to measure what I eat.

It's the fall season and we are always looking for new and great ideas to enjoy and share with our family that would be appropriate for the season.  Here is a favorite pumpkin fritter appetizer recipe that I have found and enjoy immensely.

This recipe will take you approximately 15 minutes to prepare and will yield 24 servings.  Each service brings with is 350 calories.                                                      
 
  •                         

  •  


    Monday, October 3, 2016

    Fall Season Treats

    It’s that time of year when the leaves start to change into vibrant colors and you can smell the change in the air.  Then you get to thinking about the upcoming holiday – HALLOWEEN.  Possibly you are looking for some fun and interesting fall season treats that you can share with those whose visit or for that exciting party you plan to attend. 

    Consider some of these ideas:

    RICE KRISPIE PUMPKIN TREATS
    Simply make your own batch of Rice Krispie treats and add in several drops of orange food coloring.  Roll the mixture into a ball by hand to create the pumpkin shape.  Decorate with green icing to show vines and then top it with a tootsie roll to create the stem. 


    HAND TREAT BAGS
    The kids will love these fall season treats that you can take to any school or church party.   Here is what you will need to have on hand:
    1.      Clear plastic food handler gloves (can sometimes be found at the Dollar Store)
    2.      Candy Corn
    3.      Popcorn
    4.      Twist Ties

    Put one candy corn in each of the fingers in each glove.  Stuff the remainder of the glove with popped and cooled popcorn.  The twist the hand shut and seal with the twist tie.  Allow yourself some extra time with the stuffing as the popcorn can be difficult to stuff into the fingers of the glove.


    FALL SEASON SNACK MIX
    Bring your sweet and salty to your fun and friendly party.  Combine the following items together. 
                1/3 bag of bugles
                1 bag of candy corn mix
                ½ bag of fall colored M&Ms
                1 bag of apple bits
                1 bag of Craisins
                2 cups of roasted peanuts
                                this recipe is compliments of www.LittleWondersDays.com


    Share the season with these fall season treats.  All who join in making and/or eating them will enjoy this tasty fall season treats
               
    If you have comments or questions, you may place them in the comment section below.  We also welcome opportunities to share your recipes with our readers.  If you wish to share your recipes, you can email them to JLMarkerKitchens@gmail.com or place them in the comment section below. 


    JLMarkerKitchens.com

    Tuesday, September 6, 2016

    Pumpkin Dessert Recipes


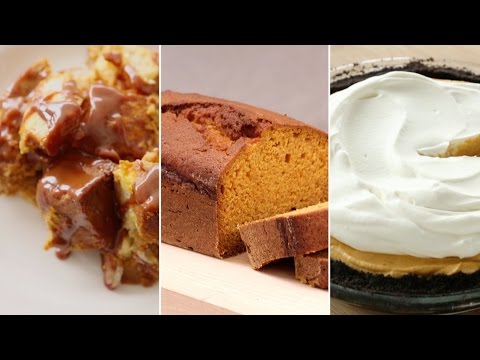
    https://www.youtube.com/watch?v=wR6Uaow072MDo you enjoy foods that are pumpkin based.  I enjoy this time of year when we start to feel the cooler breeze in the evening, the color of the leaves are changing and the fall smells are in the air.  It's bonfire time, time for hayrides, Trick or Treating and pumpkin pie.  It's the time of year when I start looking for different pumpkin dessert recipes and experiment a little.  I came across quite a few  delicious options.  Enjoy these yummy pumpkin dessert this fall season.  They are quick and easy.  Give it a try.  Click here to watch this video for three great pumpkin desserts. 
    JLMarkerKitchens.com

    Wednesday, August 24, 2016

    Cauliflower Pizza Crust


    Cauliflower, pale and unassuming, like its relatives, is a nutritional powerhouse.  It has only 25 calories per serving and delivers more than 75 percent of the recommended daily vitamin C, a good dose of dietary fiber.    You will also find vitamin K, potassium, magnesium, and antioxidants. 
     
    Cauliflower can make a great substitute for mashed potatoes when you mash and mix with a little milk, butter and Greek yogurt. 

    Consider making a roasted cauliflower soup.  Puree with chicken or vegetable stock and your choice of fresh herbs for this creamy dish. 

    Raw or steamed cauliflower is mild-mannered, however, when roasted, it caramelizes into sweet nutty goodness.   There is so much you can use cauliflower for as a replacement for other higher calorie and/or carb foods. 

    Have you ever made Cauliflower crust for your pizza.  Here is a great recipe to try.

    1 large head of cauliflower
    1 egg
    ½ cup parmesan cheese
    1/3 cup goat cheese, softened
    ¼ tsp salt
    ¼ tsp black pepper
    ½ tsp Italian seasoning
    Pizza toppings of your choice

    Preheat oven to 400 degrees.  Cut cauliflower head into small florets.  Place on a parchment-lined rimmed baking dish.  Roast for approximately 15-20 minutes until lightly golden and very tender, tossing occasionally to prevent burning. 

    Remove from oven, let cool until you can safely handle.  Finely chop, or pulse in a food processor, until the cauliflower is a rice-like consistency.  Place cauliflower “rice” in the middle of the clean thin cotton dishtowel or two layers of cheesecloth.  Wrap up the cauliflower in the towel and twist to squeeze out as much excess liquid as possible.  (this is an important step to be sure that the crust is chewy and somewhat crisp – not soggy)

    Place the cauliflower in a mixing bowl.  Add egg, cheese and seasons.  Mix thoroughly and pat into a tight ball.  Line pizza pan with parchment paper.  Spray with nonstick cooking spray.  Firmly pat the cauliflower mixture so it forms a tight, ¼ inch thick crust in the shape you desire.

    Bake in a 400 degree oven for 10 to 15 minutes until it becomes golden brown.  Remove from oven and add desired topping.  Return to the hot oven for an additional 5 to 8 minutes until the toppings are hot and cheese is bubbly. 

    Let cool slightly for only 2 to 5 minutes before cutting and serving.  One head of cauliflower will make one 12 to 14 inch pizza.

    Enjoy!
                
    If you have comments or questions, you may place them in the comment section below.  We also welcome opportunities to share your recipes with our readers.  If you wish to share your recipes, you can email them to JLMarkerKitchens@gmail.com or in the comment section below. 
     
    JLMarkerKitchens.com


    Wednesday, August 17, 2016

    Homemade Dinner Rolls

    Do you love homemade dinner rolls?  When I cook a meal for my family or for a large holiday gathering, I love to make fresh baked homemade dinner rolls.   I love to watch everyone enjoy the freshly baked bread aroma when they enter the home.  It pleases me to see the expressions when they take the first bite of the warm roll with butter or apple butter on it.  Homemade dinner rolls are a beautiful and tasty enhancement to the delicious meal you have before them.

    My cousin shared a nice family recipe which I am sharing with you.  Now, you, too, can feed your family some great freshly baked homemade dinner rolls.  Please note that this recipe will yield more than four dozen.

    4 Tbps shortening
    ¾ C granulated sugar
    1 ¼ tsp salt
    2 eggs
    2 C warm milk
    1 C water
    3 Pkgs of dry yeast (1 strip or 1 cake)
    7 C flour

    Cream shortening, sugar, salt and eggs.
    Separately, add yeast to warm water, stir and let set. 
    The next step is to heat the milk for one to two minutes in microwave. 
     
    Add flour and knead the dough well. 
    Be sure to mix well.
    Add the shortening mixture, and yeast mixture to the warm milk.

    Place the dough in a greased bowl and let it rise double in size.  Form the dough into rolls, and let rise and bake at 350 degrees for about 8-10 minutes.


    Helpful Hints: 

                Warm Water:  Be sure your water is warm to the tough, a few degrees about room
                 temperature and warm enough to dissolve the yeast.  Be careful that the water is not hot and              kills the active yeast which would causing the dough to NOT raise. 

                 Warm Milk:  Same as the water.  Be sure that it is warm, not boiling hot, as it could kill
                the rising action of the yeast.

     If you have comments or questions, you may place them in the comment section below.  We also welcome opportunities to share your recipes with our readers.  If you wish to share your recipes, you can email them to JLMarkerKitchens@gmail.com or in the comment section below. 

    JLMarkerKitchens.com

    Tuesday, August 9, 2016

    Did you know .... Kitchen Helpful Hints Part I


    Sometimes we find the coolest and neatest information online or hear great kitchen helpful hints from our mothers, family and friends.  Here are just a few that I've come across.  Feel free to share these tips with your kids, or other family and friends.

     Did you know.....

    1.      You should keep (store) your spices in cool, dark, places and not keep them above your stove.  The reason for this is because the humidity, light and heat will cause the herbs and spices to lose their flavor.


    2.      If you are preparing a nice meal and/or dessert for a VIP (Very Important Person) like your boss, your pastor or similar, you may not want to make a new recipe.  They never seem to work out the first time.  Be sure you are creating a dinner that you know you have perfected before.


    3.      To keep your pasta from getting mushy, be sure to cook it one (1) minute less than the package instructions and then finishing cooking it the rest of the way in the pan with sauce. 


    4.      When you are cooking and realize that you need to add more oil to the pan, be sure to add it in a stream along the edges of the pan.  By doing so, by the time the oil gets to the food being prepared, the oil will be heated.


    5.      Deep frying food is often times messy and doesn’t work the way you want, however, when placing the food in the cooking oil, you may want to hold each piece of food with long tongs as you add it to the oil. It should be held just below the oil’s service for a period of five (5) seconds before letting it go into the oil.  This will prevent the food item from sticking to the bottom of the pot or the other food in the oil.


    There are more helpful hints where these came from and we will be sure to share in future “Did You Know…..Kitchen Help Hints” blogs in the near future. 

    We welcome you to share your kitchen helpful hints with us in the comment section below.  We will recognize your submission in a future blog. 

    JLMarkerKitchens.com


    Tuesday, August 2, 2016

    Watermelon Sticks and Slices

    'Tis the season for watermelon.  Graduation parties, family reunions and summertime birthday celebrations often mean that watermelon will be included in the menu.  Whether by pot luck or by planned menu, you will find that watermelon slices will be sitting pretty on the table. 

    How do you cut your watermelon?  There are some very simple ways and then again you can be very creative and carve the perfect design into the shell. 

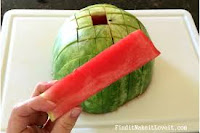
    Here are a few options from which to choose, but I have found that my favorite which is VERY EASY, is to create watermelon sticks rather than watermelon slices. 

    Make Watermelon Sticks  - perfect for kids and parties
    You may want to view this video to the left showing the best way to cut watermelon sticks.  These are perfect for kids to handle.  Sometimes people just want a little piece that easy to eat.  These watermelon sticks are perfect for that, too. 

    https://www.youtube.com/watch?v=7PLYOQbJgq0Watermelon ArtMaybe you want to try to be even more creative.  There are many videos and books out there to help you be the master at carving a watermelon and giving your guests a lot to talk about.  Carving a watermelon can be as easy or hard as you want it to be.  Check out the
    video to the right and see what you can do. 

    Come on, give it try! 

    Tuesday, July 26, 2016

    Red Raspberry Jelly Crescent Cookies

    Here is a yummy treat that can be a bit habit-forming to eat.  It’s the Red Raspberry Jelly Crescent Cookies.  “I bet you can’t eat just one” of these.  When made properly, they are small and bite size.  They are like little “poppers” that you can pick up and pop right in your mouth. 

    One bite, IF you can eat just one of these red raspberry jelly crescent cookies, can satisfy that sweet –tooth craving. 

    The recipe below is one of my favorite homemade cookies for the holidays, however they can be made at any time of the year.  These Red Raspberry Jelly Crescent Cookies can be made for any event – weddings, baby showers, bridal showers, birthday parties, anniversaries or any time you want to make a special treat for your family. 

    You can replace with strawberry, blueberry or any other fruit flavor that you desire, if raspberry is not your favorite flavor.

     
    The ingredients needed for the Red Raspberry Jelly Crescent Cookies are as follows:

    8 oz room temperature cream cheese
    1 1/3 cups softened butter
    2 2/3 cups flour

    Mix the cream cheese, butter and flour.  Blend the ingredients well.  Separate the dough into five (5) dough balls.  Wrap the dough balls separately in plastic wrap, then refrigerate overnight.

    Roll dough ball on lightly floured surface to form circle.  Cut into approximately twelve (12) wedges  (however, if you wish to have smaller, bite size cookies; you may wish to cut the dough ball in half before rolling to form a circle to make smaller wedges). 

    Spread a thin coat of Red Raspberry Jelly (or your preferred flavor) on the rolled out dough circle – wedges.    Roll the wedges to the point and shape in crescent formation. 

    Bake at 350 degrees on an ungreased cookie sheet for 10-15 minutes.  The bottoms should be lightly browned.   Cool them on a rack. 

    After they are cooled, drizzle frosting on the cookies. 

    The ingredients for the frosting is as follows:
     
    1 cup confectioner sugar
    4 tsp lemon juice

    Blend these ingredients well and drizzle on the cookies.  

     
    Helpful tips:

    Butter should not be replaced with margarine. 

    Be sure to refrigerate the dough overnight.  There is definitely the need for refrigeration-for a minimum of no less than 10-12 of refrigeration. 

    When spreading the jelly on the rolled out dough, be sure that it a thin layer.  If you put too much jelly on the dough, it will squish out, baked out of the cookies and cause your cookies to stick to the pan and/or cooling rack. 

    Do not drizzle the frosting on hot cookies.  They need to be cooled.  Otherwise, the icing will melt and run off of the cookies.

    These Red Raspberry Jelly Crescent Cookies can be frozen for up to 3 months (sometimes longer, if package properly in a nicely sealed container.

    Don’t leave them out on the counter unless you want them to disappear quickly, as each person passing by with “pop one” and before you know it, they are gone.  Enjoy!

     
    JLMarkerKitchens.com 

    Monday, July 18, 2016

    Cream Cheese Pizza Dip

    Want to serve the best enjoyed appetizer at the next party you attend?  I’m always looking for great ideas, that can be easy to prepare and easy to transport as well as easy to enjoy. 
     
    Here is a great recipe for a Cream Cheese Pizza Dip that everyone will enjoy and will wish you had made more for the party. 

    The ingredients required for this Cream Cheese Pizza Dip is as follows:

                    8 oz of cream cheese, softened
                    ¾ cup light mayonnaise
                    1 cup shredded mozzarella cheese
                    3 oz sliced pepperoni, chopped
                    2 ripe plum tomatoes, chopped
                    10 large black olives, chopped
                                                                                4 crusty Italian rolls – ½” pieces

     
    Heat the oven to 350 degrees.  In a large bowl, mix together the cream cheese, mayonnaise, mozzarella cheese, pepperoni, tomatoes and olives.  Spoon into a 6 cup baking dish. 

    Bake at 350 degrees for 30 minutes, until lightly browned and bubbly.  Allow to cool slightly.  Serve with the bread pieces for dipping. 

                                         *****************************************
    I do make a few changes to this recipe which helps to make preparation and serving of the dish a little easier. 

    First of all, I don’t always use the crusty Italian rolls, instead, I will by the Tostitos Dippers.  They don’t get stale as fast as the rolls.  They are in a bag ready to be served. 

    Secondly, I often used regular mayonnaise or salad dressing (Miracle Whip) to give a little different taste. 

    Finally, because some people don’t like to bite into a tomato or olive, and prefer a smooth texture dip, so I will chop them real fine or even puree them.  You can use a pizza sauce and use the smaller - tiny pepperoni so to save time on cutting up the pepperoni. 

    I also like to lay a few pepperoni and black olives on the top as garnishing for decorative look. 

    Share and enjoy at your next party. 

    Wednesday, July 13, 2016

    Pool Party and Summer Fun Ideas

    It is summer time and it's a great time for you to be creative with your next pool party and have summer fun ideas with the snacks that you provide at your summer fun picnic or pool party.  You could be the nice and generous host or hostess and serve up regular snack likes chips, oreos and other purchased goodies.  However, think how much more fun it would be to serve up cute little snacks that provide entertainment and conversation.   You would be fun and exciting hostess!

    Here are a few ideas:

    Consider decorating your small sandwich cookies by using colored icing to create beach balls.  You can easily decorate a purchase cookie like the vanilla cream sandwich cookie or similar or, better yet, make your own sugar cookie, putting icing between two cookies to make a sandwich look.  Then decorate the top.  What Fun!


    Here you can fill disposable wine glasses with blue jello and top with gummy fish candies to make it look like the fish in the water.  You can mix smaller gummies inside the jello as well. 
    The beach scene is one that everyone will ask -- "how did you come up with such a cute idea"?  Using nutter butter sandwich cookies, you can ice them to look like flip flops.  Laying them on a bed of finely crush graham crackers and adding a few star shaped candies and other beach themed ideas will be a creative tray to be serve for all of your outdoor festivities. 


    Be your creative self and enjoy.  If you have a great idea, we would love to share your ideas with our readers.  Feel free to comment below and give us your most creative ideas. 


    One word of caution.....  People will love your ideas, your creativity and may request that you throw all of the parties or at minimum make all of the snacks for it.    

    JLMarkerKitchens.com

    Saturday, July 9, 2016

    Strawberry Spinach Salad

    Love strawberries?  Love a nice fresh salad?  Nothing better than a nice and refreshing salad that uses fresh ingredient from your garden.  Get yourself some fresh strawberries or other mixed berries, add some spinach leaves and other lettuce if you prefer, and stir in other vegetable such as onions, black olives for example.  Below is a very yummy strawberry spinach salad that you will absolutely love and enjoy.  


    Monday, July 4, 2016

    Cooking Spoons, Gadgets and Tools

    What do you do with your stirring spoons when you are cooking?  Do you have a little dish, spoon holder or do you simply place your messy spoon on the counter?  Many times when I'm cooking, I wonder what to do with the sloppy cooking tool once it has been in the pot.  Knowing that I'm going to use it again, I don't want to throw it in the sink, but then again, do I want to leave a message on the counter. 

    If I leave the cooking spoons, gadgets or tools in the pot, they get too hot for me to handle, so I don't like to do that.  So....

    I did get myself one of those spoon holders that I keep by the stove, but it only holds one cooking tool.  Therefore, I typically have a mess on my counter.

    Then I found these nifty slotted, notched spoons.    The Rachael Ray Lazy Solid Spoon-Blue is awesome for your cooking and stirring needs.  With the notched side it easily sits on the edge of the pot and will not fall in.  Furthermore, because of it's silicone material, it does not get hot, so you can handle it easily.  Finally, because it stays on the edge of the pot, there is no messy counter because you placed the cooking spoon on the counter.

    So keep the drips off your countertops for less clean-up with the Rachael Ray Tools and Gadgets Lazy Solid Spoon. The spoon is made from silicone material that's comfortable in your hand and heat safe up to 500F. When you're all done, the spoon is dishwasher safe for quick and easy clean-up.


    JLMarkerKitchens.com
     

    Wednesday, June 29, 2016

    Food Garnishing Tips and Decoration Ideas

    Let’s quit having the dull, unorganized and every-day picnics.  Let’s throw the picnic or party that everyone would envy.  Everyone who is anyone in your circle of friends will be in attendance and will be talking about the great party you put together for days, weeks or even years. 

    Food garnishing tips can be found in a variety of places.  You can Google it.  You can find books at the retail store and you can come up with your own ideas. 
    My niece is a huge Disney fan and has cut watermelon slices into the shape of Mickey Ears with a popsicle stick inserted for handling.  My sister has cut apples into flower designs, on skewers sticks to make a beautiful edible bouquet.  I had found a recipe to Pilgrim hats from cookies, candy and icing. 

    You can be creative and make a themed party more interesting with a few helpful hints.  Food garnishing tips and decoration ideas can provide for you easy-to-follow directions, too. 
    Here are few food garnishing tips and decoration ideas that I’m happy to share with you. 


    Take the snack size milky way bars, with some plain m&ms and a teddy grahm to make these cute little car. 

     
    Garnish a few bananas, kiwi and halo slices placed perfectly on a plate to create a summer themed treat. 


    If it’s Thanksgiving, take a Hershey kiss, with a chocolate chip and half of a nutter butter round to create the perfect looking acorn favors.  (This picture shows the full nutter butter cookie, but I prefer using only 1/2 of it for thinner "cap" on the acorn.  Connect them with a small of icing, or lightly held the end of the Hershey kiss and chocolate chip)

     
    If you wish to be more creative a need a helpful tool for your food garnishing and decoration ideas, consider this item.  The Ronco Food Decorator and Garnishing Tool helps you to easily decorate a variety of foods with the V-Shaped Food Decorating Knife. With it's dual-ended design, you can easily use the knife for a variety of jobs. Use one end to decorate grapefruit, potatoes, tomatoes, and more, and use the other end to grate carrots or create cheese strips. It's the perfect way to add that extra touch to your dish. 

    Make your party the one everyone talks about for a long time to come.
     
    JLMarkerKitchens.com

    Friday, June 24, 2016

    Best Way to Make Hard Boil Eggs


    I enjoy a hard-boiled egg.  Do you?  I make about one dozen hard boil eggs nearly every week.  I have at least one for lunch 4-5 days a week.  My grandchildren come over often and enjoy them, too.  To not have hard boil eggs in my house is taboo!

    There are a few ways that you can make them.  You can put them in a pot and boil them, or pick of number of other ways.  If you google “how to make hard boil eggs” you will get a plethora of options from which to choose. 

    The problem we often have is cracking and peeling the shell.  Ouch!  The sharp shell can poke your fingers.  The sticky shell can adhere to the egg and you end up peeling part of the egg with it.  Once in a great while you will get one that shells perfectly.  But there is another way.  Hard boil you eggs and create them to be without the shell. 

     Eggies can potentially be the best way to make hard boil eggs.  Do you have this set?  These are great because they are hard boiled and already shelled and ready to egg.  You have the best of both worlds by getting hard boiled eggs, already without the shell and without the pain of remove the shell. 

    Consider using this best way to make hard boil eggs without the shell.  You will be glad you did. 
     

    Sunday, June 19, 2016

    Food Injector, Do you have one?


    Do you baste?  Do you marinate?  Do you inject flavors to your beef, chicken, pork or fish?  I was a pretty bland cook when I was first married. I was not raised to add many spices or flavors to my food.  My parents truly believed that beef should taste like beef, chicken like chicken and so forth.  My dad would say, if you want your beef to taste different, then eat something different. 

    After marriage, however, my husband taught me to experiment.  I was nervous and rarely did so, but when he got in the kitchen we had some of our best meals.  They were full of the flavors of this world and threw me into a new realm of cooking, and enjoying various foods.  We would marinate and/or use a food injector to put other flavors in the meat.  We would use the food injector to put jelly in baked rolls, or pudding in cupcakes. 

    Do you have a food injector?  I didn’t for the longest time and now it is one of the neatest gadgets I have in the kitchen.  One injector that I like is the Ronco Liquid Flavor Injector. 

    It’s perfect for:

                    *injecting all type of liquid flavors into your favorite foods
                    *injecting liquids and other juices or oils into chickens, turkeys, roasts and other meals
                    *can be used for injecting puddings or fillings into baked good.

    Having that one food injector that can do a variety of jobs in the kitchen is helpful.  This food injector can also be used as a baster.  It has the capacity of seven (7) teaspoons. 

    You should get one for your kitchen today. 


    JLMarkerKitchens.com 

    Sunday, June 12, 2016

    NO BAKE CHOCOLATE PEANUT BUTTER COOKIES Recipes and Hints


    When I was young, I started making the No Bake Chocolate Peanut Butter Cookies.  My paternal grandmother made these yummy cookies for the family reunions.  They were in huge hit by everyone.  She would have to stash some away so that they were not consumed all at once and when everyone thought that the No Bake Chocolate Peanut Butter Cookies were gone, she drag out the stash, only to see big smiles yet on all our faces.

    In 1979 , sadly, my grandmother passed away and I was blessed to receive her recipe.  So I started making them for the family reunions.  Like my grandmother, I found that I had to put a stash away for a later time in the day, too.  This way, they would be spread out for the group to enjoy throughout the day.  Since that time, I’ve been requested to make them for many different gatherings 

    Is my recipe is special?  No.  Does it have anything different in my No Bake Chocolate Peanut Butter Cookies that is not in other recipes?  No, not really, but I do have a few helpful tips that can help you to make good No Bake Chocolate Peanut Butter Cookies. 

    The recipe is forthcoming, but first, read these helpful hints:

    1.        Don’t double the recipe.  It work for me to double the recipe, because of the formula of the ingredients and the amount of heat and boiling that it requires.  If more than one batch is your need, simply make them individually. 

    2.      Use the timer.  The recipe calls to bring the ingredients to a boil.  Be sure to bring it to a complete boil,  then start the timer for one minute.  Do not over cook or under cook the cookies.  Over cooking the cookies will result in crumbly, dry cookies.  Under cooking the cookies will provide you with a runny mess. 

    3.       Let Stand for One (1) Minute:  I let my cookies stand for about one minute before dropping them on the wax paper.  This gives it a little cooling time and will not drip as much. 

    4.       Shape them for appeal.    After dropping them by spoonful on the wax paper, I take a fork, dipped in cool water, and press them around the sides shape them to a round appearance and eliminate the rough oatmeal edges that tend to spread.  I also press the top lightly to flatten slightly, getting rid of the “high-top”.  Continue to dip the fork in cool water often to keep it from sticking to the cookies.

    5.       Loosen the wax paper from the countertop.    After the No Bake Chocolate Peanut Butter Cookies have hardened (hours later), remove them from the wax paper more easily, by lifting the wax paper off the counter or table top first.  Then they will easily peel from the wax paper.

    6.       Store in air tight container.   To prevent the cookies from drying out, keep them in an airtight plastic storage container.  Keeping them on a plate with plastic wrap will work, but a container that is air tight  would be better. 

    The recipe for No Bake Chocolate Peanut Butter Cookies that I make follows:

    1 stick of margarine
    2 cups of sugar
    ½ cup of milk

        Combine in a sauce pan, cook ingredients and bring to a boil.  Once the margarine is completely melted and the sauce comes to a hard boil, boil it for one minute, stirring occasionally. 

    Add :
    ½ cup of peanut butter

    Once melted, add:

    4 tablespoons of cocoa
    1 teaspoon of vanilla

     Mix well and add
    3 cups of 1-minute oatmeal.

     Stir well.  Let stand and then drop by teaspoons on wax paper.  Yields approximately 42 cookies

    Enjoy.
     
    JLMarkerKitchens.com

    Monday, June 6, 2016

    The Perfect Chocolate Chip Cookies


    My children think that I make perfect chocolate chip cookies.  Do I?  Maybe, maybe not but they think that I do and that is all that I care about.  I will say, however, that many others will tell me the same and ask me how I do it?

    They are appear nearly all perfectly round.  They appear to be perfectly browned, and they are light and fluffy, not flattened or crunchy.  The picture to the right is of some chocolate chip cookies that I just freshly baked yesterday. 
    There is no big secret or special ingredient that makes the cookies seem so perfect, but, I do have a few things that I do consistently when baking, especially my seemingly perfect chocolate chip cookies. 

    I believe elevation and humidity can play a large part in how any baking may turn out.  It can affect the temperature that you should use on your oven and it can affect how long you may need to bake your tasty treats.  However, for me, the brand of ingredients can make a huge difference.

    I have found that all granulated sugars differ in the amount of moisture they contain as well as the size of the grain.  It can be real fine, or heavier.    These differences have been found to make a difference in how my baked goods turn out. 

    Since I can’t control the humidity, I try to be consistent with the brand.  When I make these so-called perfect chocolate chip cookies, I use Domino sugar, and Robin Hood flour. 

    So that they give the nearly perfectly round appearance, I roll the dough in 1” balls, rather than dropping by teaspoons on the ungreased cookie sheet.  When they bake out, they have no choice but to stay round.

    Typically when you bake cookies, especially those calling for baking soda as one of the ingredients (much like the recipe I use does), the cookies will puff up through the baking process.  When they are in the last minutes of baking they will tend to flatten out.  Therefore, I remove them from the oven in advance of the “flattening” process, just before the cookies is completely baked. 

    One last little tip that I have for making these seemingly perfect chocolate chip cookies, is that although the recipe calls for the use of butter, I opt to use shortening instead.  Additionally, I’m particular about the type of shortening.   Do I think there is a different in shortening?  Not really, my sister makes the best pies and she says there is no difference  I guess I’m just a particular in this department.   Butter will make the cookies tastes more rich, and creamy, but shortening will make them more light and fluffy. 

    Below is the recipe that I use:

                    ¾ Cups of Domino Granulated Sugar

                    ¾ Cups of Domino Brown Sugar

                    2 eggs

                    1 teaspoon of baking soda

                    1 teaspoon salt

                    1 teaspoon vanilla

                    Cream these items together and then add:

                    2 ¼ Cups of Robin Hood Flour

                    Mix well and then fold in semi-sweet chocolate chips by hand.

                    Roll the dough in 1” balls and place on an ungreased cookie sheet

                    Bake at 350 degrees for approximately 10-12 minutes or until lightly browned, but not yet flattened.  Remove from the oven, and let the cookies sit on the tray for about 30 seconds before removing to a paper towel to cool.  Store in a seal-tight container, so that moisture stays with the cookie and doesn’t dry out.

    Tip:  Do not leave on the cookies on the baking tray too long because the cookies will continue to bake on the heated cookie tray. 

    JLMarkerKitchens.com